For business-to-business companies, webinars play a huge part in the buyer’s journey.
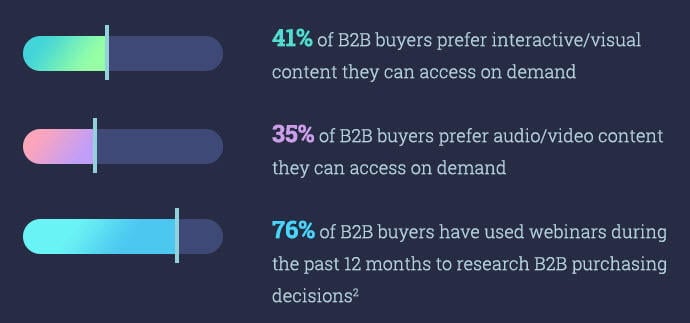
Data from ClickMeeting’s new “State of Webinars 2018” report suggests that 76% of B2B buyers attend webinars in order to help them make purchasing decisions.
Whether you use webinars to explain more about the products and services you offer, or to educate and inform your audience on something useful to them, webinar marketing is a key type of video marketing, which is currently seeing spiking interest among marketers and audience members alike.
Video marketing is hot these days for many reasons. One, it triggers emotion, and people are eager to share content that evokes emotion. Two, video is more engaging that plain text. Audience members will typically spend more time with your content to watch a video than they will to read a blog post. And, perhaps most importantly, video both increases your return on investment (ROI) and boosts your conversion rates.
However, you need good ads to promote your webinars and to get the most value for your efforts. Without the right kinds of ads, copy that speaks to your audience, and a powerful visual to support it, your campaign could fall flat. Then, you’ve wasted ad spend and still don’t enough attendees signed up for your event.
Webinars can be used at the top of your sales funnel, but most experts agree that they’re most effective in the middle of the funnel, once your prospects have gotten to know your brand a little bit and will be more open to dedicating undivided attention to your presentation. That’s why Facebook’s advertising platform, with its super sophisticated targeting capabilities, is such a good match for driving registrations on your webinar platform of choice.
Here’s how to use Facebook Ads to promote your next webinar.
1. Opt for Lead Capture Ads
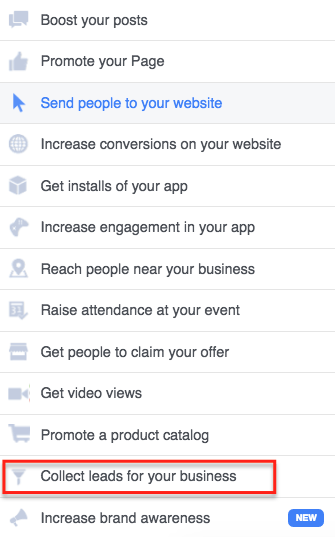
Instead of using Facebook ads to drive people to a landing page, start using Facebook Lead Ads. These allow people to opt-in to your email list directly from the Facebook app, so there’s less friction involved in the process.
Plus, to make things easier on you, you can set up Zapier so it automatically sends confirmation emails, adds the contact to your customer relationship management (CRM) software and more. When someone has to take fewer steps to accomplish something, you’ll end up with higher conversion rates. And automating things on the backend will save your business time while also reducing error potential.
In your Facebook Ads account, follow these steps to create a Lead Capture Ad:
Click “Create.”
Choose “Quick Creation” or “Guided Creation”. (We’re showing you how to do things in Guided Creation.
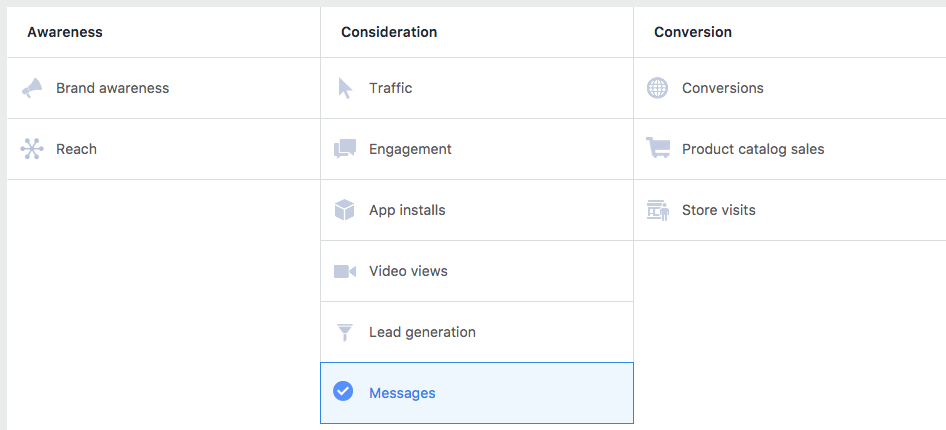
Choose the “Lead Generation” objective.
Add your Page to the “Page” section. Click “View Terms” and select “I Agree to Terms and Conditions.”
Set your audience, placements, and budget and schedule. Remember, you cannot use this type of ad to target anyone under the age of 18.
Click Continue. Then name your ad and select your page to attach to your Instagram account, if applicable.
Choose your ad format, then add the images or video to your ad. Fill in the headline, text, and add the Call to Action button.
Assuming that you’re using a Facebook pixel to track all of your audiences’ engagement, click “Show Advanced options” to add it.
In the “Lead Form” section, click “+ New Form” to create a new lead form. You can also choose a form you’ve already created, and click “Duplicate” to modify a form you’ve already built.
Add in the data you want for your form, choosing the information you want to ask for, and adding the questions.
Click “Privacy Policy.” Add the URL to your website’s privacy policy. Add an optional custom disclaimer if you want to provide more information.
Click “Thank You Screen” to add a custom screen to keep your leads engaged after they submit the form.
Click the arrows at the bottom of your “Form Preview” to make sure your form looks how you want it. Click “Finish” to complete the form, or “Save” to save your work so you can make changes later.
If you have a CRM you want to connect, you can optionally go back to “Publishing Tools” and choose your CRM in the “Leads Setup” section. No, HubSpot’s free CRM is not among the tools that are directly supported by Facebook Ads, but you can get the two platforms playing nicely together with some Zapier magic.
Once you’re ready to publish the ad, click “Place Order.”
2. Build Custom Audiences
Take advantage of the custom audiences feature in Facebook Ads to target people who registered for past webinars, as they are a potentially high-intent mid-funnel audience.
Target those who’ve purchased certain products, or those who’ve visited combinations of your web pages. Increase customer retention by empowering your existing customers with product use case-specific tips.
This way, you’re maximizing your ad budget because you’re only targeting people your brand has come in contact with already – those that are already nearing conversion or likely to make repeat purchases.
Depending on how you want to build your audience, the Facebook Pixel may be able to help. If “people who visited specific web pages” does the job for you, just click through to the “Audiences” tab of the Ads Manager, select “Create Audience,” then “Custom Audience,” and you’ll be able to set up the rest using this drop down menu.
Alternatively, you can dollow these steps to create a custom audience from your CRM or other customer data system.
Use customer data to create a list of either email addresses or phone numbers.
Save the list in either CSV or TXT format.
Go to Ads Manager and click “Audiences” tab.
Click “Create Audience’” > “Custom Audience” > Customer List
Upload the file. Facebook will have your audience ready in about 30 minutes. It will match accounts to the information you provide.
If you want to connect to people who’ve visited your website and haven’t provided data to you, you’ll need to have a Facebook pixel installed on your website.
3. Use Facebook Messenger Ads
Facebook Messenger Ads offer more dynamic personalization features than any other format. There’s less clutter on the screen, and you get to use conversational informality to build a better relationship with your prospects. These are all key advantages when dealing with the middle of the funnel, as is the case usually with webinars.
Facebook offers three types of Messenger Ads: Destination Ads, Sponsored Messages, and Home Section Ads.
- With the Destination Ads approach, users browsing their newsfeeds are given the option to send you a message. This ad style sends people to a message thread with your page, instead of a landing page where you’re asking people to buy.
- Using the Sponsored Message ad allows you to deliver a message directly to a user’s inbox. For instance, you could offer people who’ve signed up for webinars in the past a special discount on a future product purchase. Or, you could invite those who’ve made past purchases to save with a limited-time exclusive buy one get one offer.
- The Home Sections Ad will show up in the home section of someone’s Messenger – where their list of conversations is. Here, you’ll attempt to generate an organic conversation with your customer, instead of treating them like just another name on your list. After making initial contact, you can personalize your customer service and tailor the experience for each user, furthering the relationship.
In your Facebook Ads account, follow these steps to create a Messenger Ad.
Click “Create Ad.”
Choose the “Messages” objective.
In the “Messages” section, choose the ad type in the drop down, and then choose the Facebook Page you’d like to be associated with the campaign.
When you opt for a sponsored message, you’ll see a custom audience is created based on the people who’ve interacted with your page via Messenger.
Under Placements, choose “Automatic Placements,” or set whatever manual parameters you like. Click “Turn On” when the notification displays.
Choose your budget and schedule. Click “Continue.”
Choose “Image & Text” or “Text Only.”
Select a “Call to Action.”
Click “Review Order” to check for any errors.
Click “Place Order.”
Facebook Ads + Webinars = Business Win
The Facebook Ads platform offers several ways to connect with people who are interested in your webinar. Whether you promote through lead gen ads or messenger ads, using a custom audience and a teaser video can help you get the most for your money.
Be sure that when you create campaigns, you’re testing ad variations to see which one gives you the most conversions. Pay attention to the value you’re communicating, use a killer CTA, and you’ll be in great shape to collect massive registration lists, consisting of qualified audience members.
About the Author
Tamar Weinberg is a professional hustler and author of the bestselling social media book The New Community Rules: Marketing on The Social Web. She blogs about all things tech and social at Techipedia.

